Automating Workflow

TiConf Amsterdam - Claire Coloma - June 29th, 2014

Automating Workflow

TiConf Amsterdam - Claire Coloma - June 29th, 2014

Who am I?

Claire COLOMA

@_ClaireColoma

We'll see how to implement:

Why automate?

When we launch a build:

There is a process that makes us waste much of time : building the application and when we launch a build it's like :

A build

1 build 15 sec
100 builds 125 min per week

One build takes about 15 seconds to run an application. If you make 100 builds a day and work 5 days on it, you have lost 125 min of your life, per week.

With TiShadow

1 build 5 sec
You can save : 83 min
≈ 4 episodes of New Girl

Just with TiShadow you will save every week about 83 min, the time to watch 4 episodes of New Girl.

TiShadow

What is TiShadow ?

TiShadow provides Titanium developers the ability to deploy apps, run tests or execute code snippets live across all running iOS and Android devices.

David Bankier

TiShadow Components

How does TiShadow work?

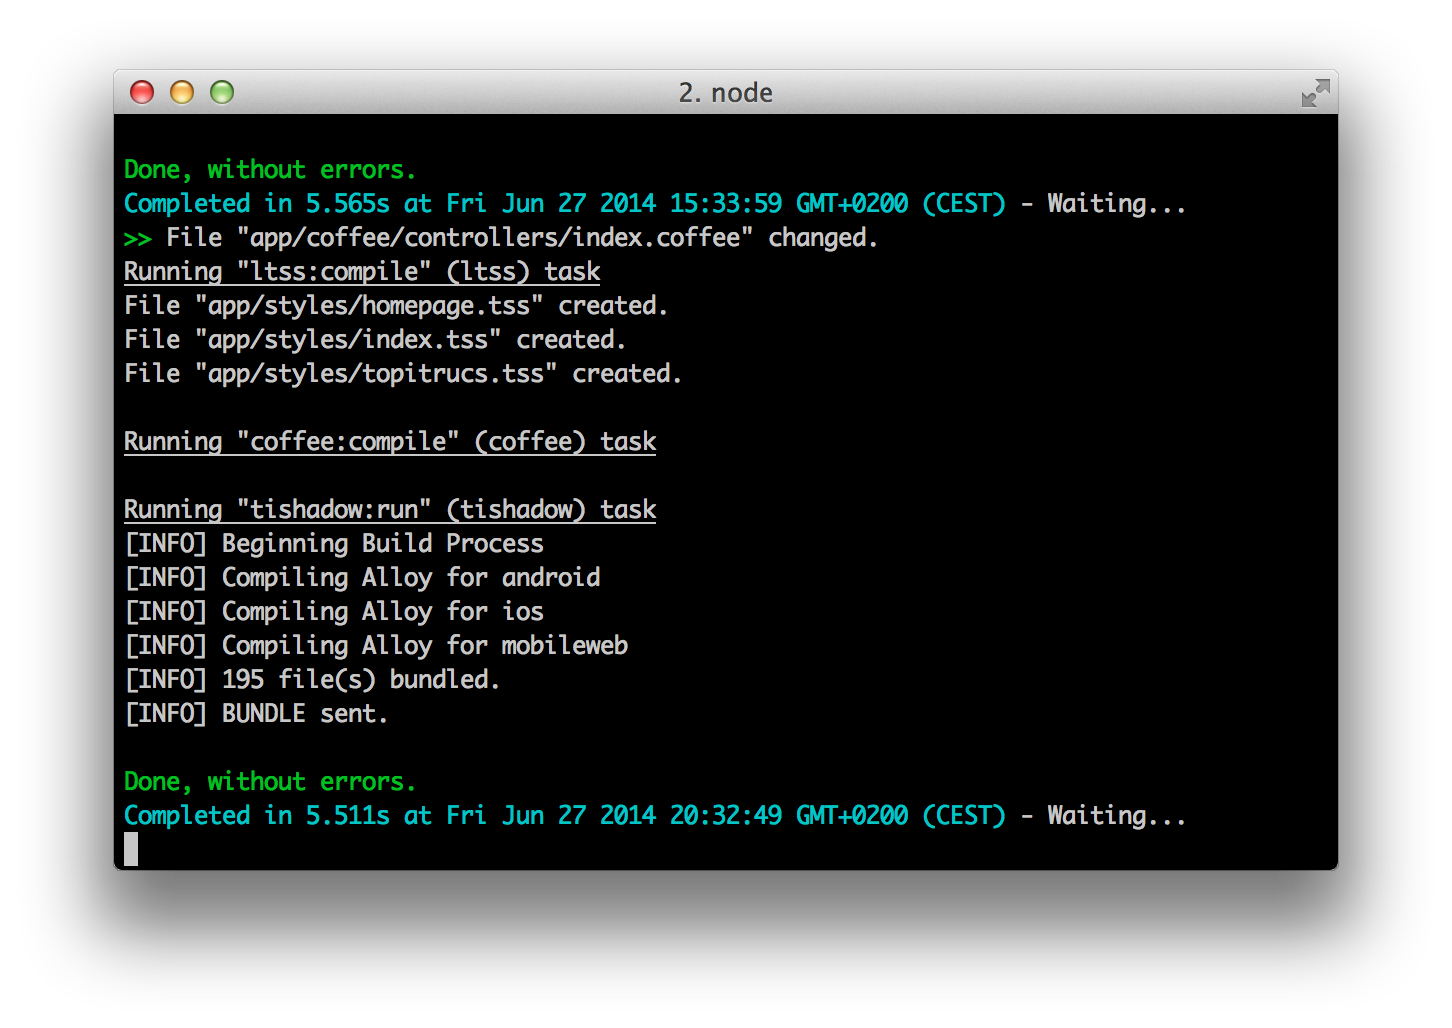
The command $ tishadow run compress the resources of your application (in zip format) and send them to the tishadow server.
Then this one distribute this package to all tishadow apps connected using websocket returning information to the cli
These apps extract contents of the package and execute the code

Install TiShadow

  1. Install TiShadow Server:
    $ npm install -g tishadow

Launch TiShadow

$ tishadow server
$ cd  ~/tishadowapp
$ ti build -p android -T device

Enter your IP address

Then, launch your application:
$ tishadow run

NEW FEATURE : TiShadow Express

New Ti command which:
  1. Launch the app
  2. Reload automatically
$ ti build -p ios --shadow

Why I've not given this command directly?

Because TiShadow is more

TiShadow: Advanced mode

Clear the application cache on all connected devices
Capture screenshots, that's so cool, when you want to makes screenshots for app store or play store, you make them one time and not for each device
by default theses captures are stock in your temporary file, but you can choose the path destination when you launch the server with this command:
spec launch jasmine test by default

TiShadow: Advanced mode

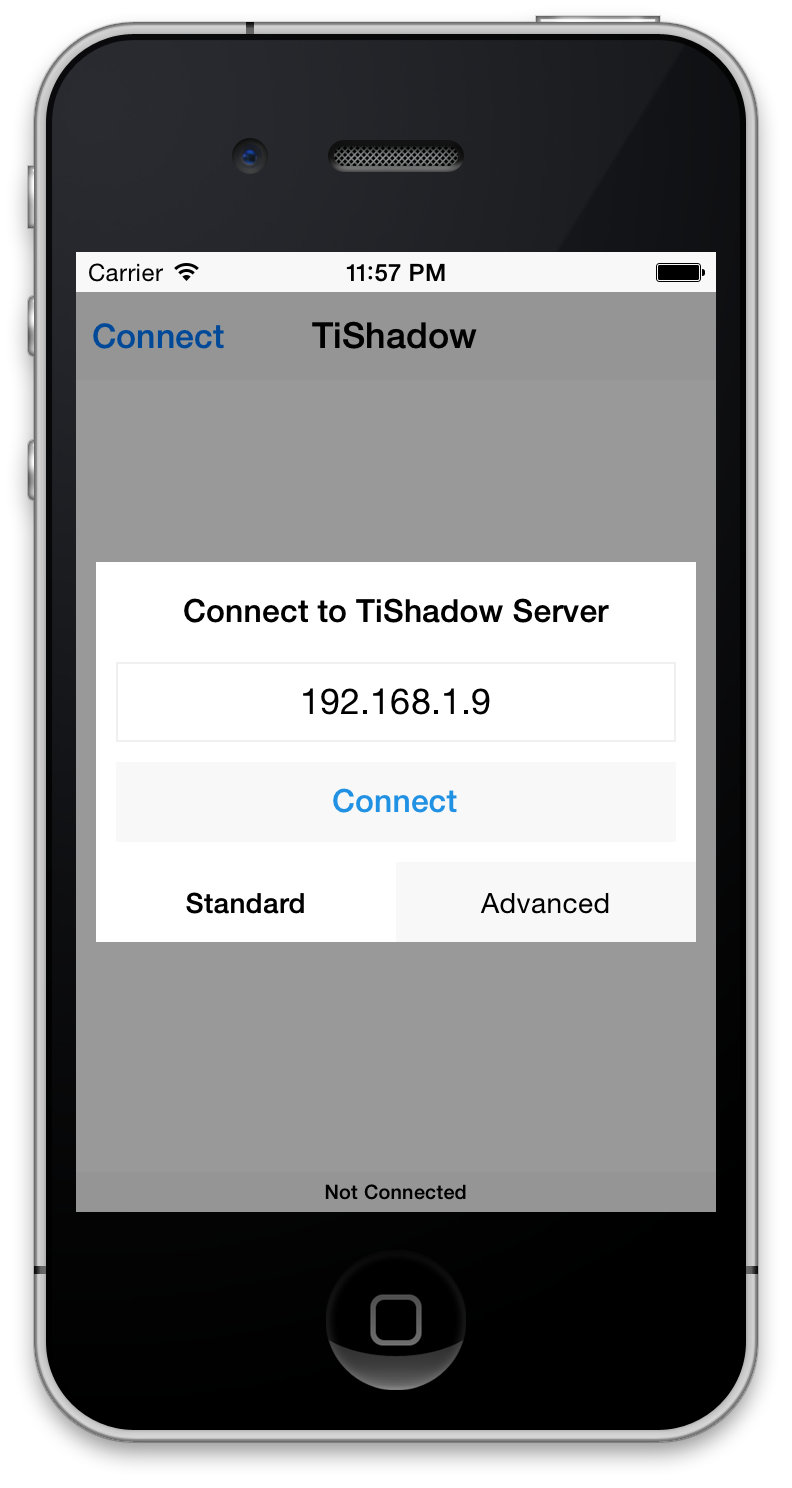
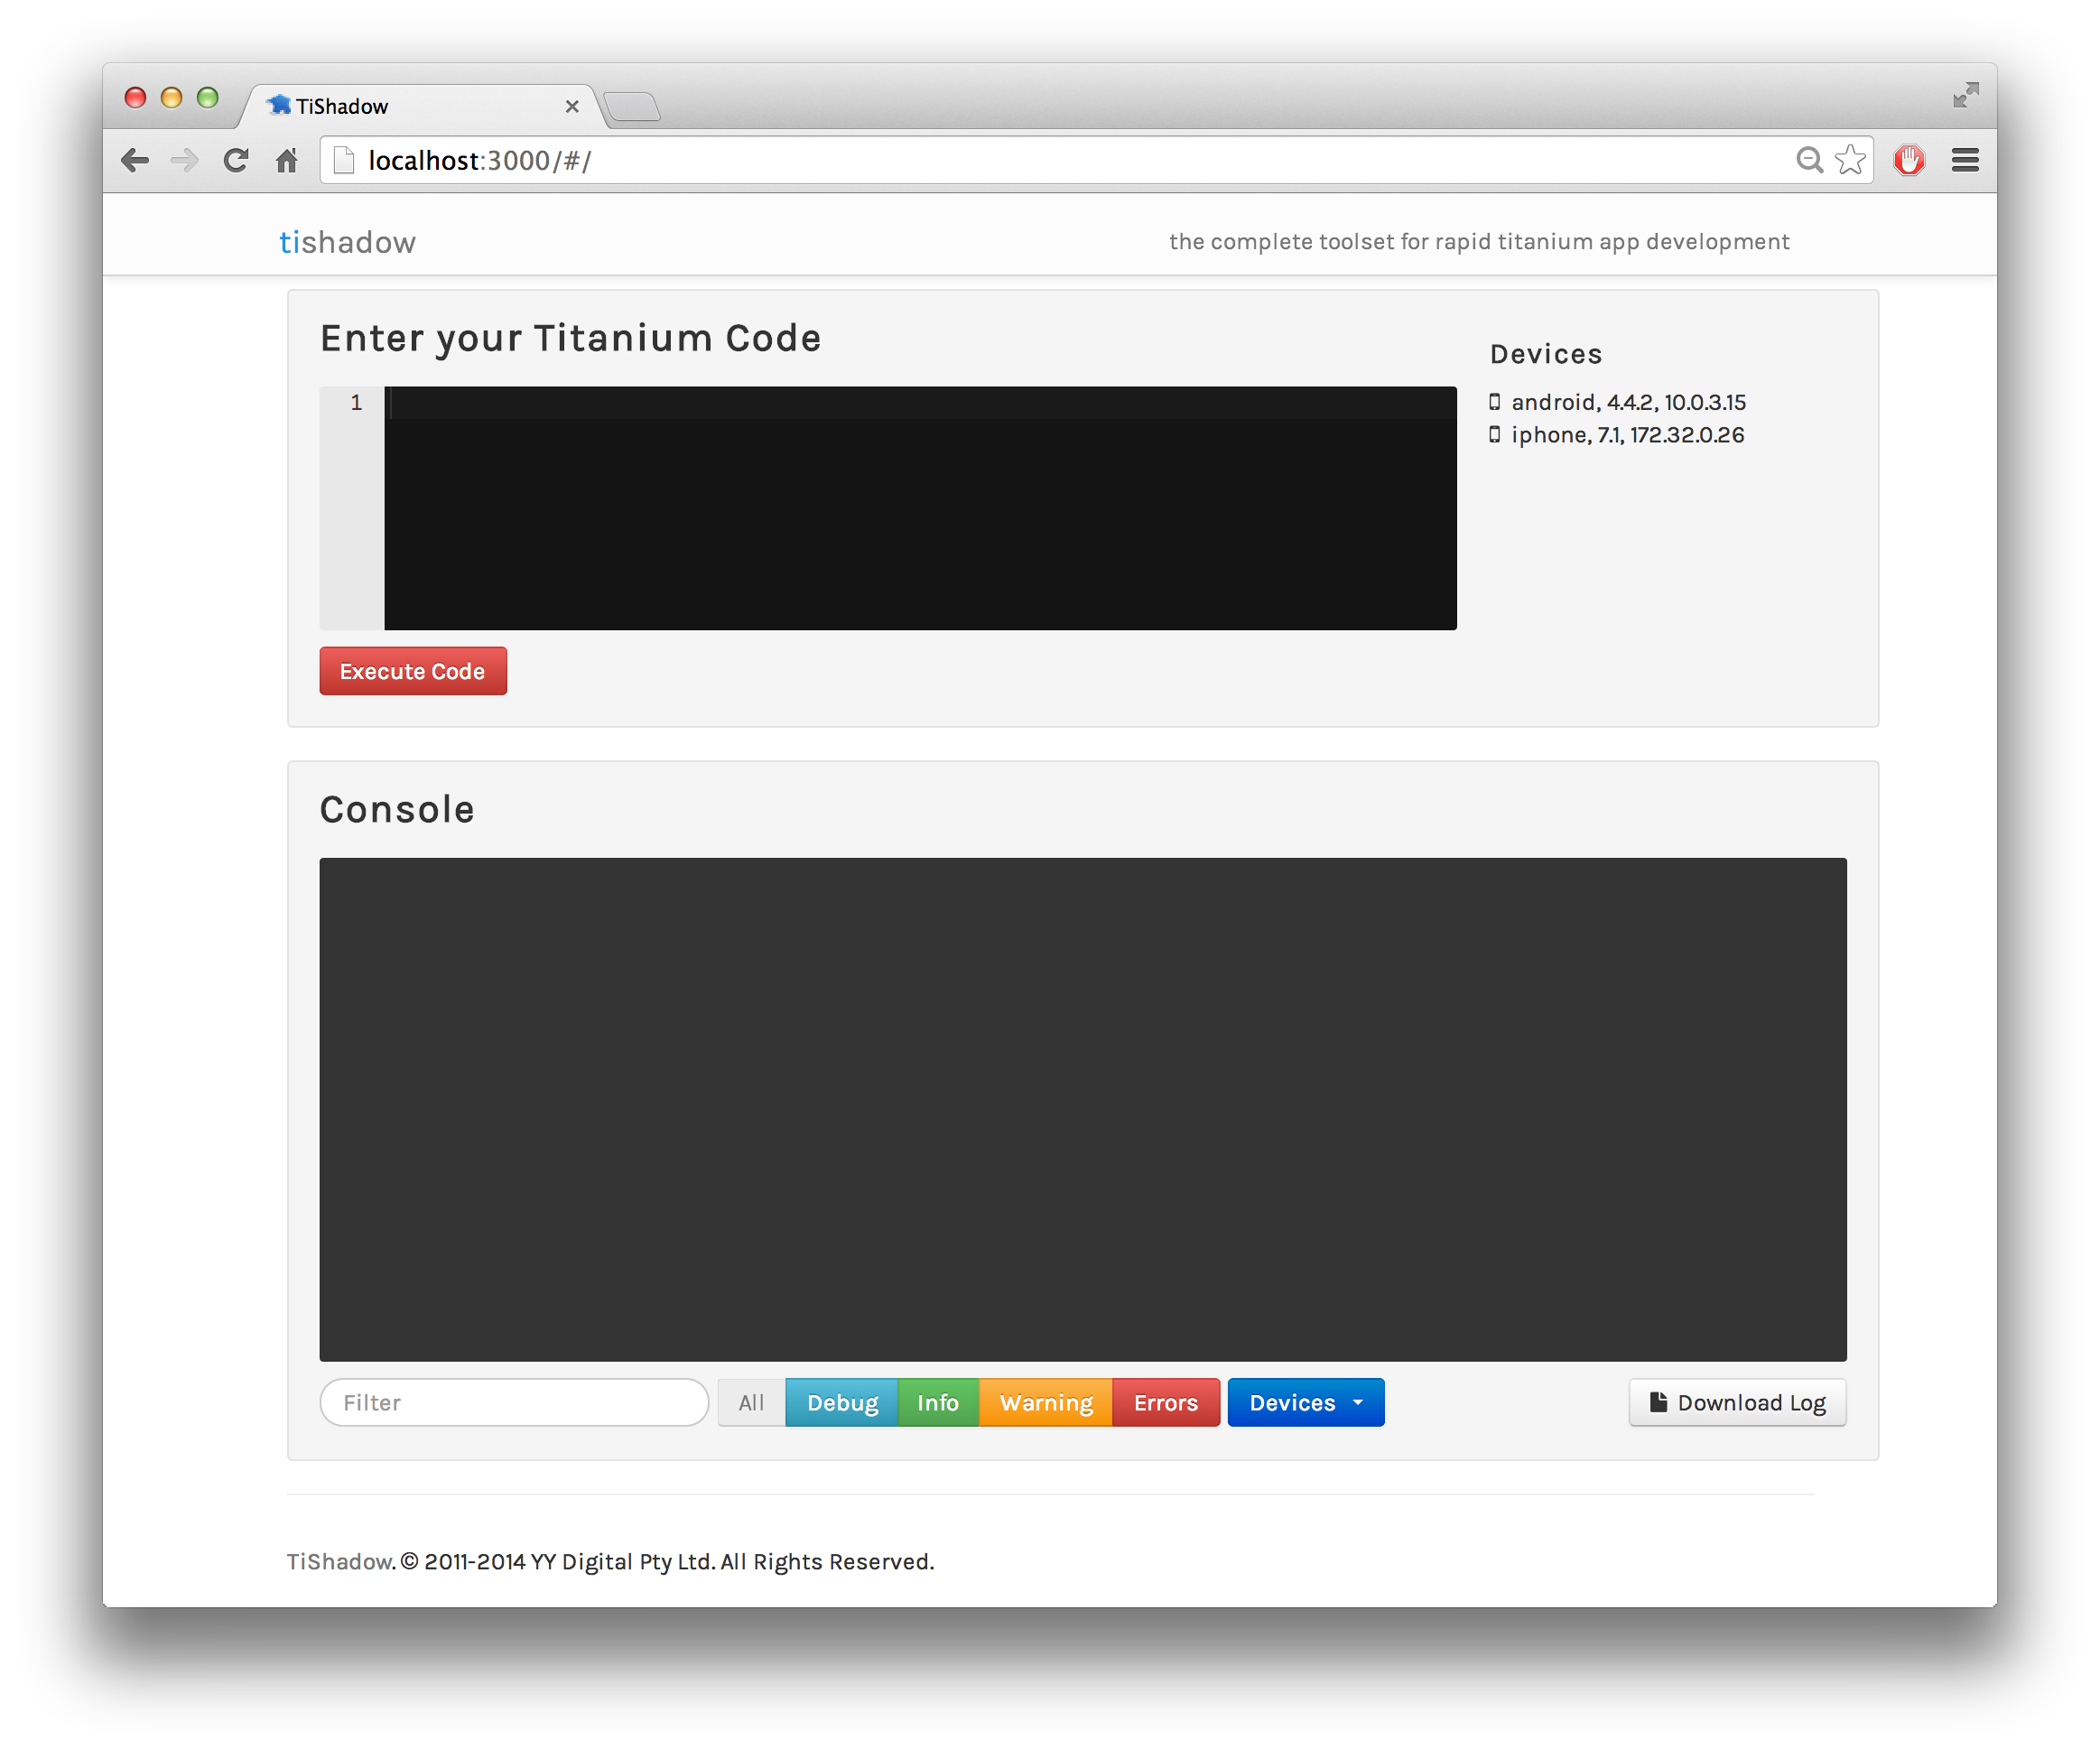
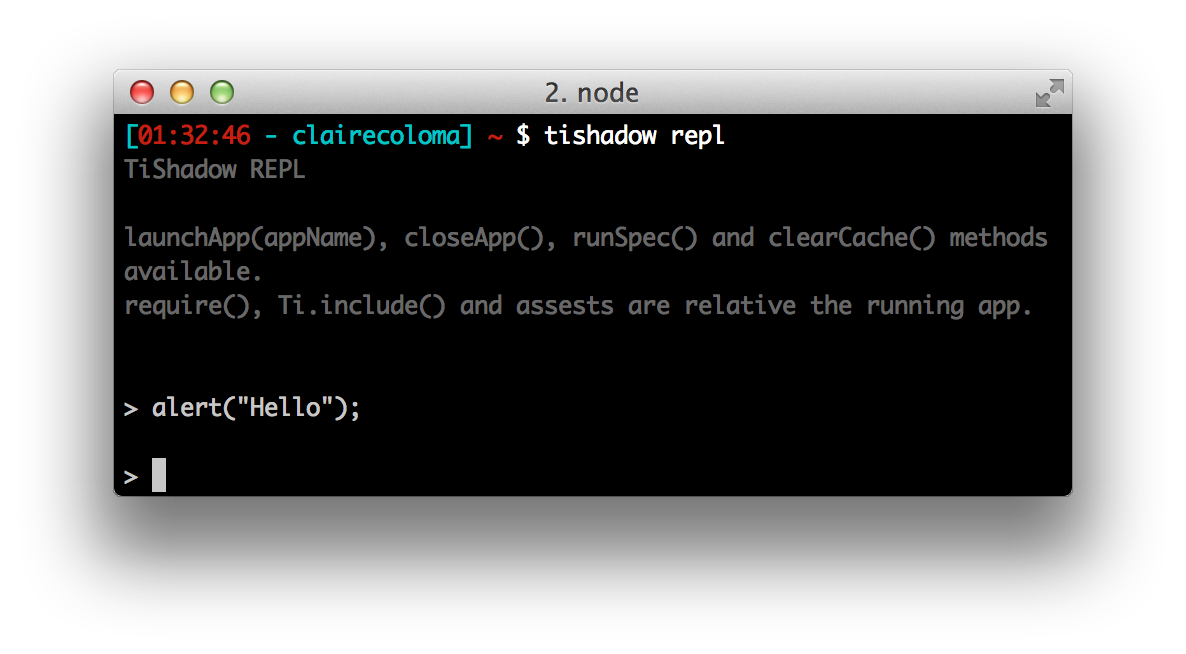
Launch the REPL (Read Eval Pint Loop) that permit you to code directly in the command line
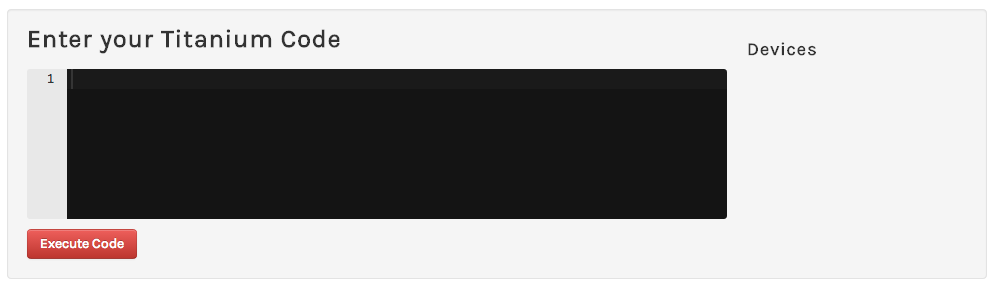
TiShadow also provide an editor where you can put your code and press the button "execute" to deploy the code snippet to all connected devices.

Do you want to save more time?

CoffeeScript

the most famous JavaScript preprocessor, that make your script more readable as well as maintenable

Syntax

JavaScript

  • You forget a " ; " ? => error

" ; " -> semicolons ; "{ }" -> curly braces

Syntax

JavaScript
var doClick = function(e) {
	return console.log(e.index);
};
CoffeeScript
doClick = (e) ->
	console.log(e.index)

Indeed, Coffee is Syntactically significant whitespace so no need semicolon or braces

Syntax

JavaScript
var math;
math = {
	square: function(x) {
		return Math.sqrt(x);
	},
	cube: function(x) {
		return x * square(x);
	}
};

alert("Three cubed is " + (math.cube(3)));
CoffeeScript
math =
  square: (x) -> Math.sqrt x
  cube:   (x) -> x * square x
alert "Three cubed is #{math.cube 3}"

Syntax

JavaScript
var button = Titanium.UI.createButton({
	title: 'Hello',
	top: 10,
	width: 100,
	height: 50
});
CoffeeScript
button = Titanium.UI.createButton
  title: 'Hello'
  top: 10
  width: 100
  height: 50

Syntax

  • JavaScript
  • ===
  • !==
  • !
  • &&
  • ||
  • true
  • false
  • Hello
  • CoffeeScript
  • is
  • isnt
  • not
  • and
  • or
  • true, yes, on
  • false, no, off

Compilation

Jade

Jade is an another way to code xml, even more, with jade you can use Variables, Conditions code, Switch case, loop, etc.

Syntax - No Tag

Jade
ul
  li Item A
  li Item B
  li Item C
XML
<ul>
  <li>Item A</li>
  <li>Item B</li>
  <li>Item C</li>
</ul>

Jade is like CoffeeScript: syntactically significant whitespace, so no need tags, just need to nest your code

Syntax - Iteration

Jade
ul
  each val, index in {1:'one',2:'two',3:'three'}
	li= index + ': ' + val
XML
<ul>
	<li>1: one</li>
	<li>2: two</li>
	<li>3: three</li>
</ul>

Compilation

LTSS

Variables

LTSS
@primary-color: #f7d325;
@secondary-color: rgb(75,134,194);

"p": {
	color: @primary-color
}
"a": {
	color: @secondary-color
}
".progressbar" {
	color: @secondary-color
}
TSS
"p": {
	color: #f7d325
}
"a": {
	color: rgb(75,134,194)
}
".progressbar" {
	color: rgb(75,134,194)
}

Mixins

LTSS
.error(@borderWidth: 2px) {
  border: @borderWidth solid #F00;
  color: #F00;
}
".generic-error" {
  padding: 20px;
  margin: 4px;
  .error();
}
".login-error" {
  left: 12px;
  position: absolute;
  top: 20px;
  .error(5px);
}
TSS
".generic-error" {
  padding: 20px;
  margin: 4px;
  border: 2px solid #F00;
  color: #F00;
}
".login-error" {
  left: 12px;
  position: absolute;
  border: 5px solid #F00;
  color: #F00;
}

CLI Usage

Cool stuff but too many commands !

Grunt

Grunt is a task runner, and you can launch task automatically, that permit you in this case to automatically compile your files

Installation

Grunt

$ npm install grunt
$ npm install -g grunt-cli
		

Features

Main plugins

Necessary files

  1. package.json : list of dependencies
  2. Gruntfile.js (or Gruntfile.coffee ☺) : load modules and configure tasks to run

package.json

{
	"name": "My badass project",
	"description": "Poney and hearts everywhere"
	"version": "0.0.1",
	"author": "Claire COLOMA",
  },
  "dependencies": {
    "grunt": "~0.4.5"
  },
  "devDependencies": {
    "grunt-ltss": "~0.1.2",
    "grunt-contrib-coffee": "~0.10.1",
    "grunt-tishadow": "dbankier/grunt-tishadow",
    "grunt-contrib-watch": "~0.6.1",
    "load-grunt-tasks": "~0.6.0"
  }
}

Gruntfile.coffee : the structure

module.exports = (grunt) ->

    # Import grunt plugins
    grunt.loadNpmTasks 'grunt-plugin'

    # Configure plugins
    grunt.initConfig()

    # Register tasks
    grunt.registerTask 'default', ['tache1', 'tache2']

Gruntfile : Importing plugins

grunt.loadNpmTasks 'grunt-img'
grunt.loadNpmTasks 'grunt-ltss'
grunt.loadNpmTasks 'grunt-contrib-coffee'
grunt.loadNpmTasks 'grunt-contrib-watch'
grunt.loadNpmTasks 'grunt-tishadow'

Gruntfile : Configuration

module.exports = (grunt) ->
  img:
    do:
   	  src: 'app/assets/images'
  coffee:
    options:
      bare:true
    compile:
      files: [
        expand: true
        src: ["**/*.coffee"]
        cwd: "app/coffee"
        dest: "app"
        ext: ".js"
      ]

Gruntfile : Configuration of ltss plugin

ltss:
  compile:
    files: [
      expand: true
      cwd: "app/ltss"
      dest: "app/styles"
      src: ["**/*.ltss", "!**/includes/**"]
      ext: ".tss"
    ]

Gruntfile : Configuration of tishadow plugin

tishadow:
  run:
    command: 'run'

  run_ios:
    command: 'run'
    options:
        platform: 'ios'

  run_android:
    command: 'run'
    options:
        platform: 'android'

Gruntfile : Configuration of watch plugin

watch:
  ios:
    files: ["app/**/*.xml", "app/**/*.ltss", "app/**/*.coffee"]
    tasks: ['compile', 'tishadow:run_ios']

  android:
    files: ["app/**/*.xml", "app/**/*.ltss", "app/**/*.coffee"]
    tasks: ['compile', 'tishadow:run_android']

  all:
    files: ["app/**/*.xml", "app/**/*.ltss", "app/**/*.coffee"]
    tasks: ['compile', 'tishadow:run']

Gruntfile : Declaring tasks

grunt.registerTask 'build', ['ltss', 'coffee']
grunt.registerTask 'default', ['build', 'tishadow:run', 'watch:all']
grunt.registerTask 'ios', ['build', 'tishadow:run_ios', 'watch:ios']
grunt.registerTask 'android', ['build', 'tishadow:run_android', 'watch:android']
And launch a task:
$ grunt [task-name]

Need at least the default task

This is where the magic happen

Thank You !

@_ClaireColoma |

Fork me on Github